Azure Resource Manager - ARM template basics
In the last two parts of the series, you have seen a brief introduction to Azure Resource Manager and the services that complement ARM to extend its functionality or support the services offered by ARM. You also looked at an overview of ARM templates and the tools available to design, author, and deploy these templates.
Starting this part of the series for the next few days, you will start learning about authoring ARM templates right from the basics and to the advanced template syntax and techniques with a goal to build an ARM template that helps provision the following architecture.
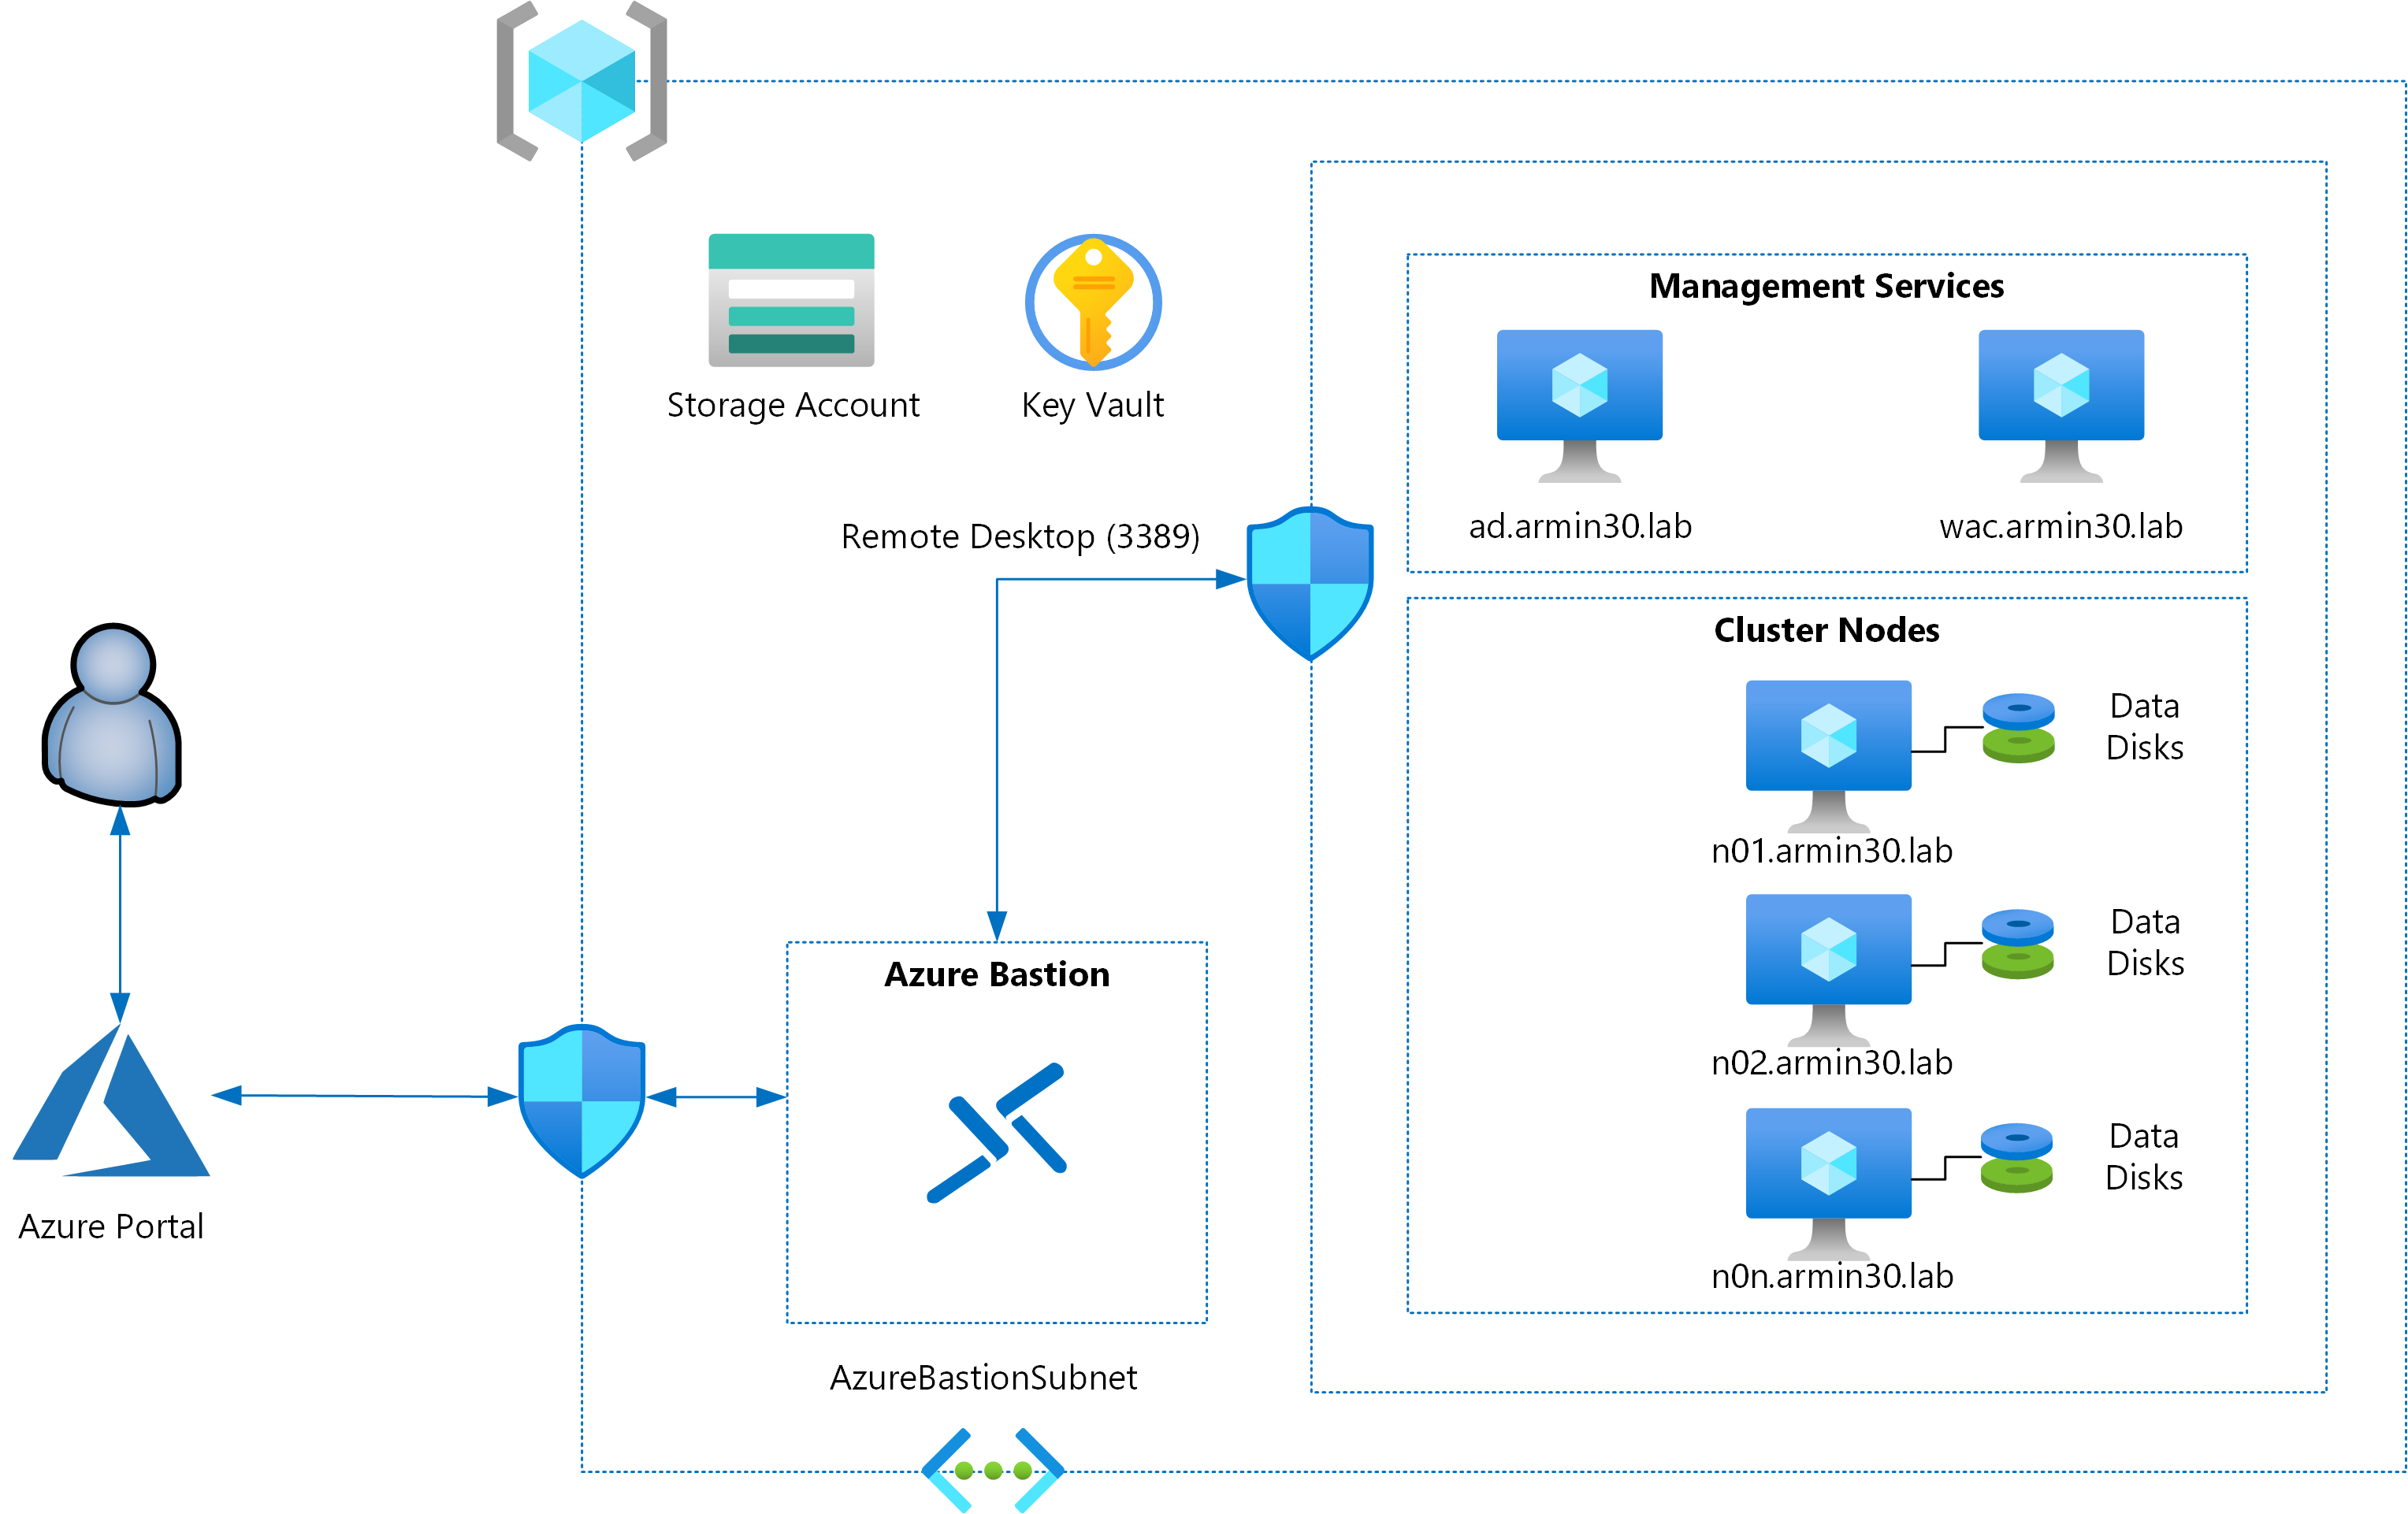
This is not a complex architecture but gives you enough scope to implement what you learn through this series of articles. Apart from this architecture, I recommend that you start looking at the quickstart templates repository and read the templates there to understand the syntax and how some of those templates are written and implement best practices. Throughout this series, you will see examples from quickstart templates repository to explain best practices in template authoring.
I strongly recommend using VS Code for ARM template authoring and the next section provides a quick overview of this before you dive into ARM template basics.
VS Code and ARM tools extension
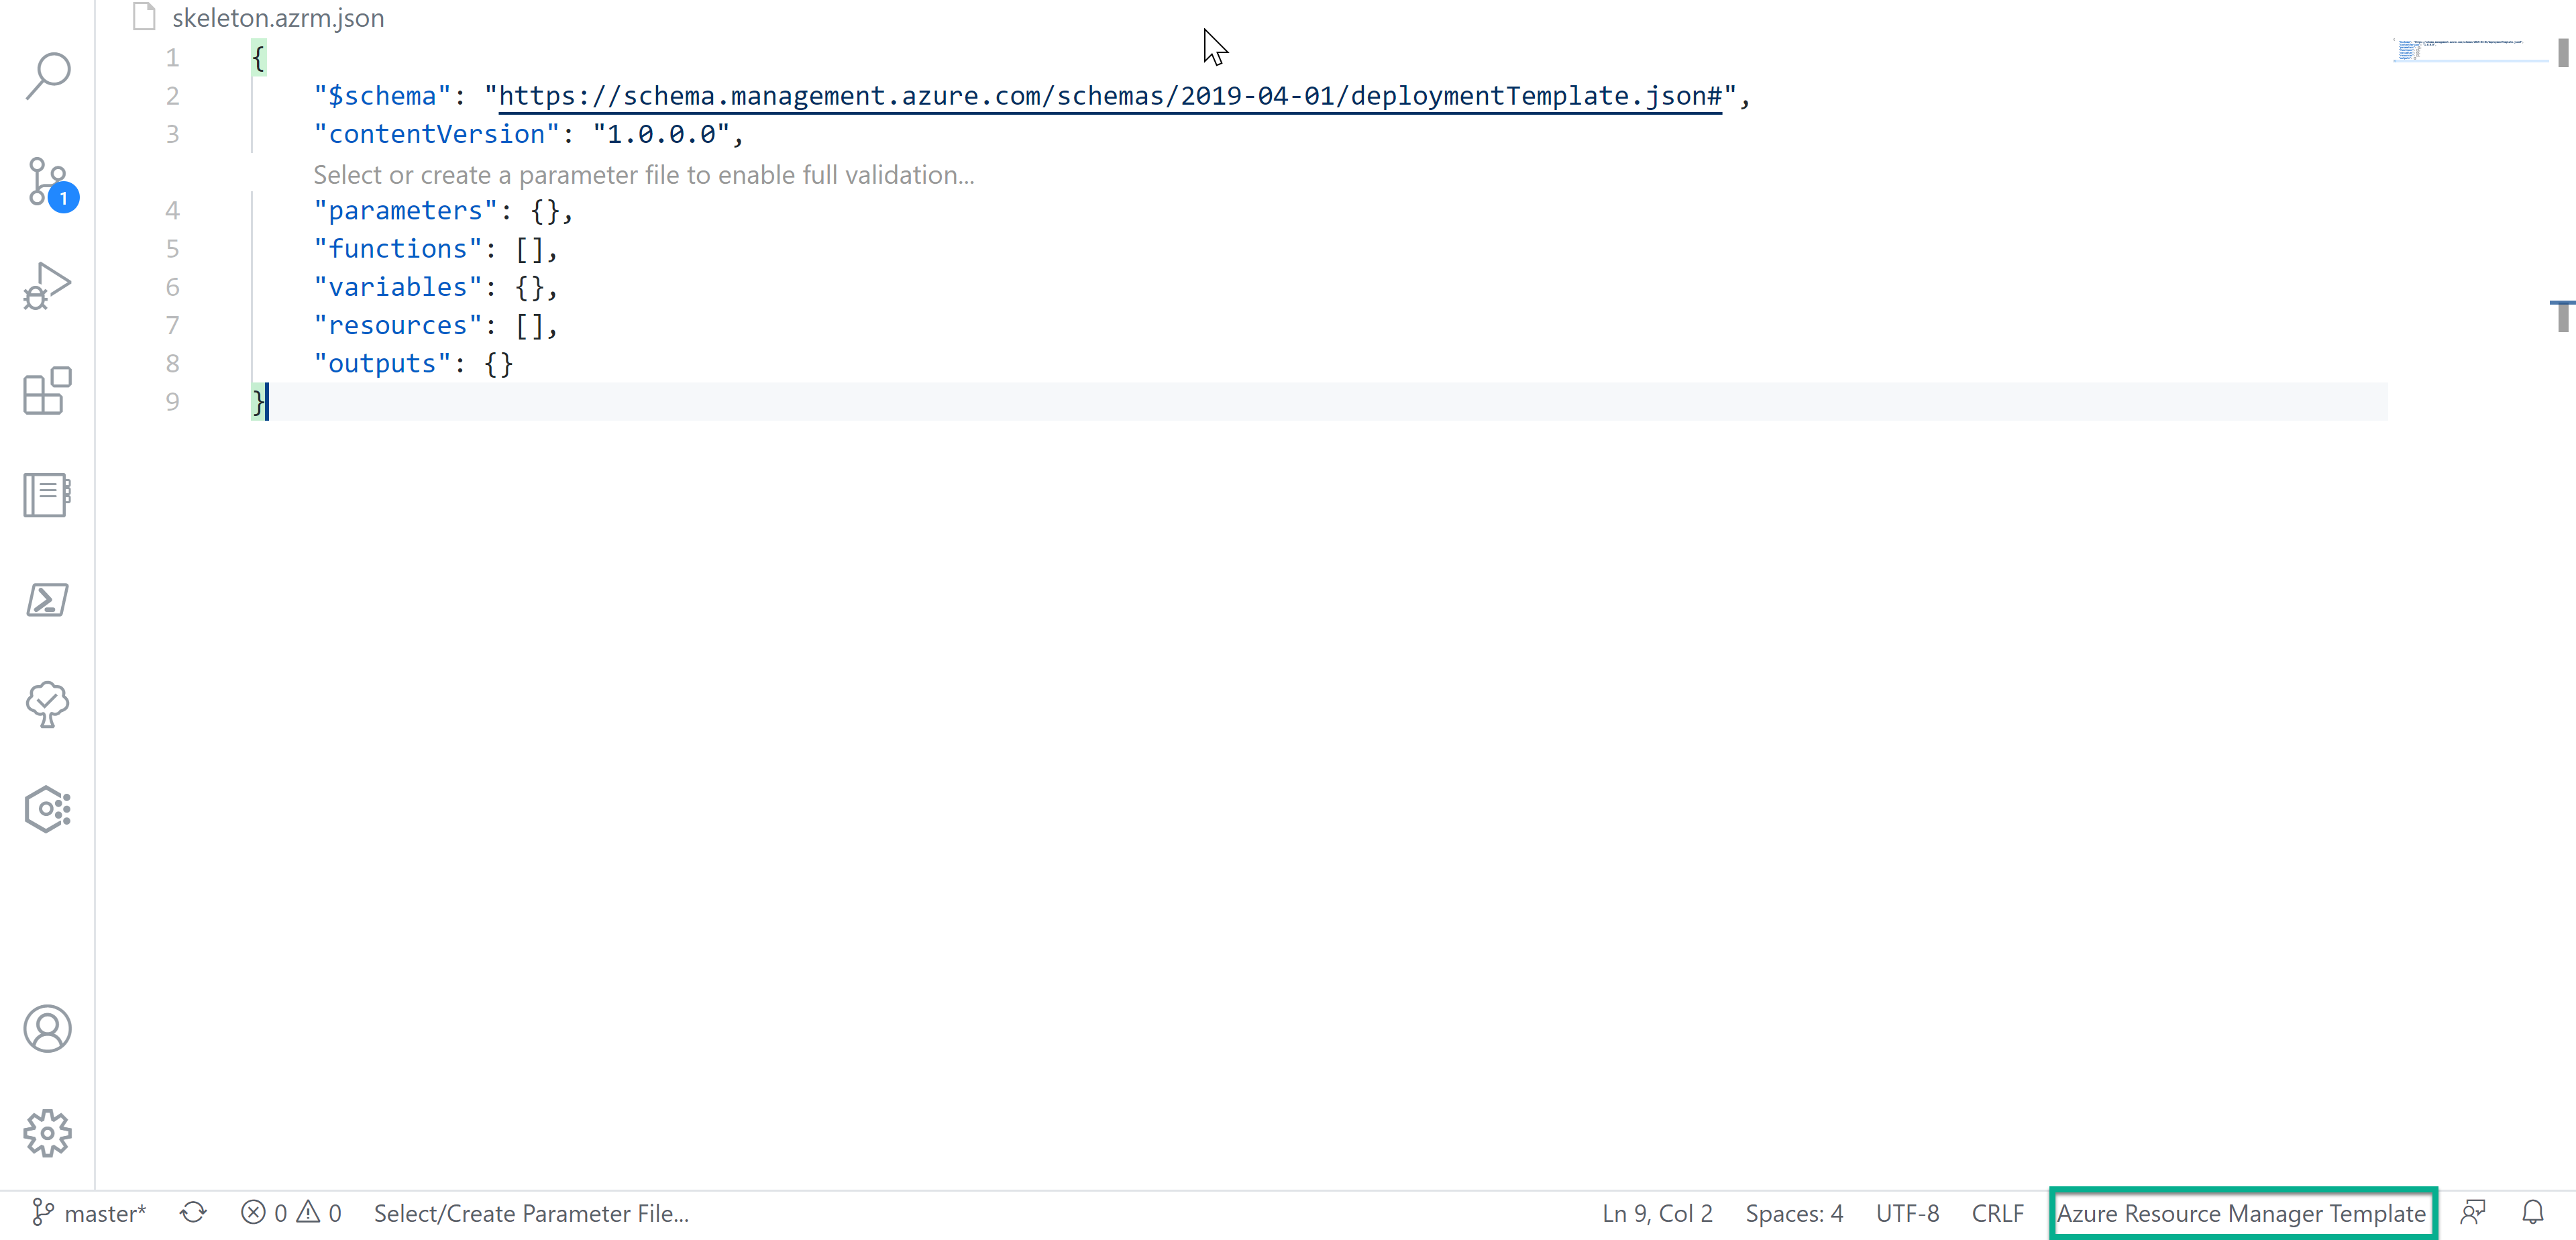
If you have already installed VS Code and the ARM tools extension, you may want to customize the extension settings for improved authoring experience and ease. By default, VS Code editor will auto-detect template files if the JSON or JSONC file contains the appropriate schema and changes the editor language to Azure Resource Manager template. You can see this in the status bar of the VS Code editor.
However, this method requires that you at least have a value for the $schema element. You can also use file association setting to detect a file in the editor as an ARM template. This can be done by adding the following in the extension settings. With this setting in place, you can even create an empty file with an extension azrm.json and the editor auto-detects and sets the editor language as ARM template.
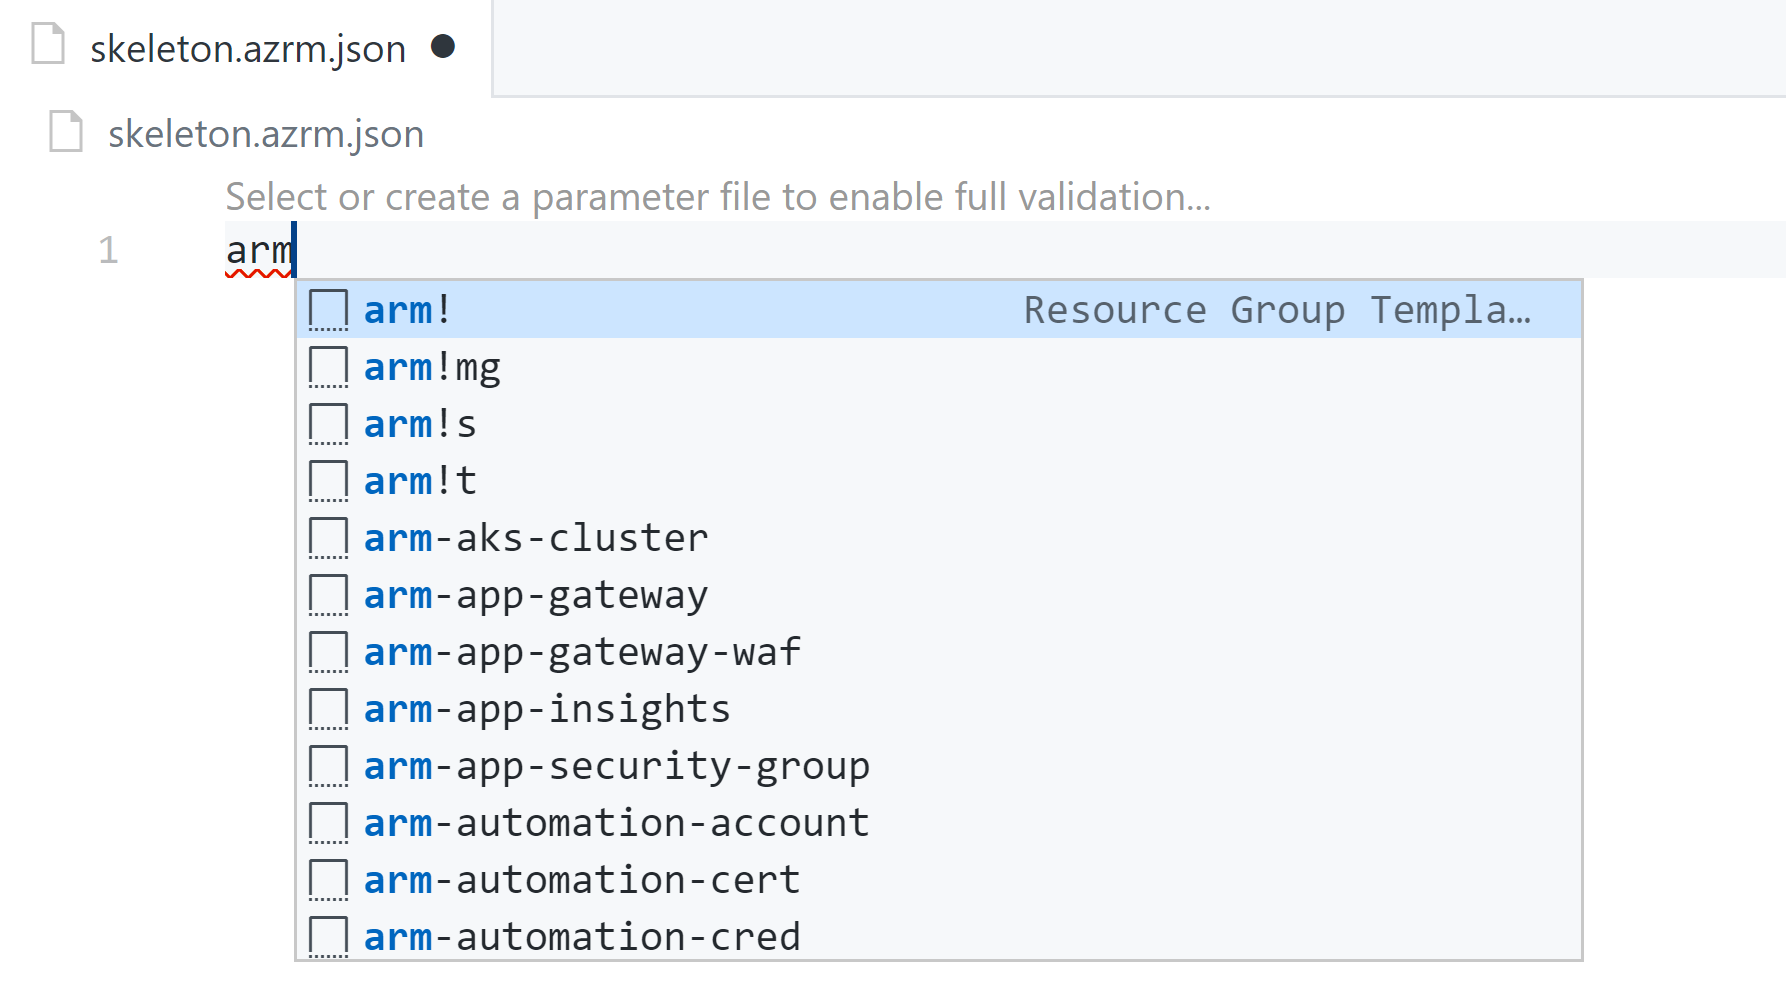
Once the editor language gets set to Azure Resource Manager Template, you can access over 70 snippets that come with the extension. For example, typing arm in the editor window, brings up the snippets that you can select and insert into the editor.
Throughout this series, you will see different features of this VS Code extension. Now, let us get started with the basics of the ARM template language.
Basics
As you have seen already, an ARM template is JSON file with additional template functions and expressions that the Azure Resource Manager understands. Here is a basic skeleton structure of an ARM template.
In the following sections, you will see quick overview of the elements in an ARM template.
$schema
This element identifies the version of template language to be used. The value of this element changes based on the type of editor and the scope of the deployment. There are four different scopes at which you can deploy an ARM template.
Subscription Scope
When you need to deploy resources at the subscription level, for example create resource groups or provision policies and resource-based access controls, you need to use subscription level deployments. For this type of deployments, the value of $schema should be https://schema.management.azure.com/schemas/2018-05-01/subscriptionDeploymentTemplate.json#
Management Group Scope
Management groups in Azure are used to organize subscriptions for better governance. When you need to provision resources such as policies at the management group level, you need to the use the management group level schema. The value of this element for management group level deployments should be https://schema.management.azure.com/schemas/2019-08-01/managementGroupDeploymentTemplate.json#.
Tenant Scope
For provisioning resources across multiple Azure AD tenants, you need the tenant scoped deployments. For tenant level deployments the value of $schema element should be set to https://schema.management.azure.com/schemas/2019-08-01/tenantDeploymentTemplate.json#.
Resource Group Scope
This is the typical type of deployment you will normally come across. When using this deployment scope, you describe resources that need to be deployed within a given resource group in a subscription. The value of $schema for this type of deployments in VS Code should be https://schema.management.azure.com/schemas/2019-04-01/deploymentTemplate.json#. For Visual Studio, this value should be https://schema.management.azure.com/schemas/2015-01-01/deploymentTemplate.json#.
You will learn more about scoped deployments in a later article in this series.
ContentVersion
This element identifies the version of the template content. This value is required but can be set to anything you want. If you use source control for ARM templates, you can increment the value of this element in your template at every commit. You will learn more about this in a later article discussing CI & CD of ARM templates.
Parameters
This element accepts a set of parameters that act as input to the ARM template deployment using which you can introduce reusability of ARM templates. If you are familiar with any programming language, similar to a function or a method parameters, ARM template parameters too support different data types, valid values, default values, and different other characteristics such as min and max values (for numeric types), and min and max length (for string types). This is not a mandatory element but highly recommended to parameterize the template.
Functions
ARM template syntax support built-in functions and expressions. These functions range from comparison functions to numeric, date, string, and so on. In a later update to the ARM template syntax, support for custom user-defined functions was added. You can now define some complex expressions that you want to use in the template as user-defined functions. This is not a mandatory element.
Variables
Variables, similar to functions, can help reduce the complexity of expressions in the ARM template. This is not a mandatory element. In an ARM template, variables are predominantly inside expressions. Between parameters and variables, you need to always a strike balance (free-form vs known configuration) to create templates are easy to deploy.
Resources
This element is where you define what Azure resource you need to deploy or update. An ARM template must have at least one resource. The type of valid resources supported in a template depends on the value of $schema element. In the next section, you will see how to author your first ARM template and you will see more about resource specification in an ARM template.
Outputs
Using this element, you can specify the values returned by the template after the deployment is complete. This element is not mandatory. This can be very useful when using nested templates and you will learn more about it soon in this series.
First ARM template
Alright! After that quick overview of the template elements, this section will get you started with your first ARM template. For this purpose, you will perform a subscription scoped deployment to provision a new resource group. Within VS Code, if you want a quick snippet that supports subscription level deployments, you can type arm!s and press enter. You can now add the following snippet under the resource element.
A typical resource specification will be very similar to what is shown above. The following table provides an overview of the resource group object properties that you can use in a template.
| Property Name | Description | Is Mandatory? |
|---|---|---|
| type | This property identifies the type of a resource that you want to provision. For a resource group, this will be Microsoft.Resources/resourceGroups. |
Yes |
| name | Using this property, you can specify a name for the resource being provisioned. | Yes |
| apiVersion | This property identifies the API version to be used for provisioning the resource. For a resource group resource, this, at present, should be 2020-06-01. |
Yes |
| location | This property specifies where there resource should be created. Some resources may not be supported in all regions or enabled in your subscription. | Yes |
| properties | Specifies additional properties needed for the resource provisioning. | Yes |
| tags | Specifies a list of tags (key-value pairs) associated with the resource. | No |
For now, you don’t have to worry about the parameters, variables, functions, and outputs in the template. You can simply leave them blank. With the addition of resource group snippet, here is how your first template should look like.
This is ready for deployment. If you want to use Azure portal for template deployments, the subscription level deployment, at present, is available only in the preview portal. The below deploy to Azure button will take you directly to the preview portal.
If you want to perform this deployment using Azure CLI, you can use the below command to perform this subscription level deployment to create the resource group.
If you have not already done so, you must first authenticate using
az logincommand.
In the above command, do not confuse the --name and --location parameters to what you have in the ARM template. These two parameters indicate the name of the deployment and location where the deployment meta data should be stored. The sub subcommand within az deployment indicates that you are doing a subscription level deployment.
Summary
In this part of the article, you looked at basics of ARM template syntax, understood different elements in the template and their purpose, saw a quick overview of scoped deployments, and finally performed a subscription level deployment to create a resource group in your subscription and used Azure CLI for this purpose. In this next part of this series, you will learn how to create reusable ARM templates by adding parameters.
Comments
Comments Require Consent
The comment system (Giscus) uses GitHub and may set authentication cookies. Enable comments to join the discussion.