Azure Resource Manager - Adding parameters to ARM templates
In the last part of this series, you learned the template syntax and authored an ARM template that provisions the resource group needed for the above architecture. This deployment was performed at the subscription level using Azure CLI. In this part, you will create another template for performing additional resource – storage account and virtual network – provisioning at the resource group level. You will, then, parameterize this template to understand how to add parameters to ARM templates.
Resource group deployment
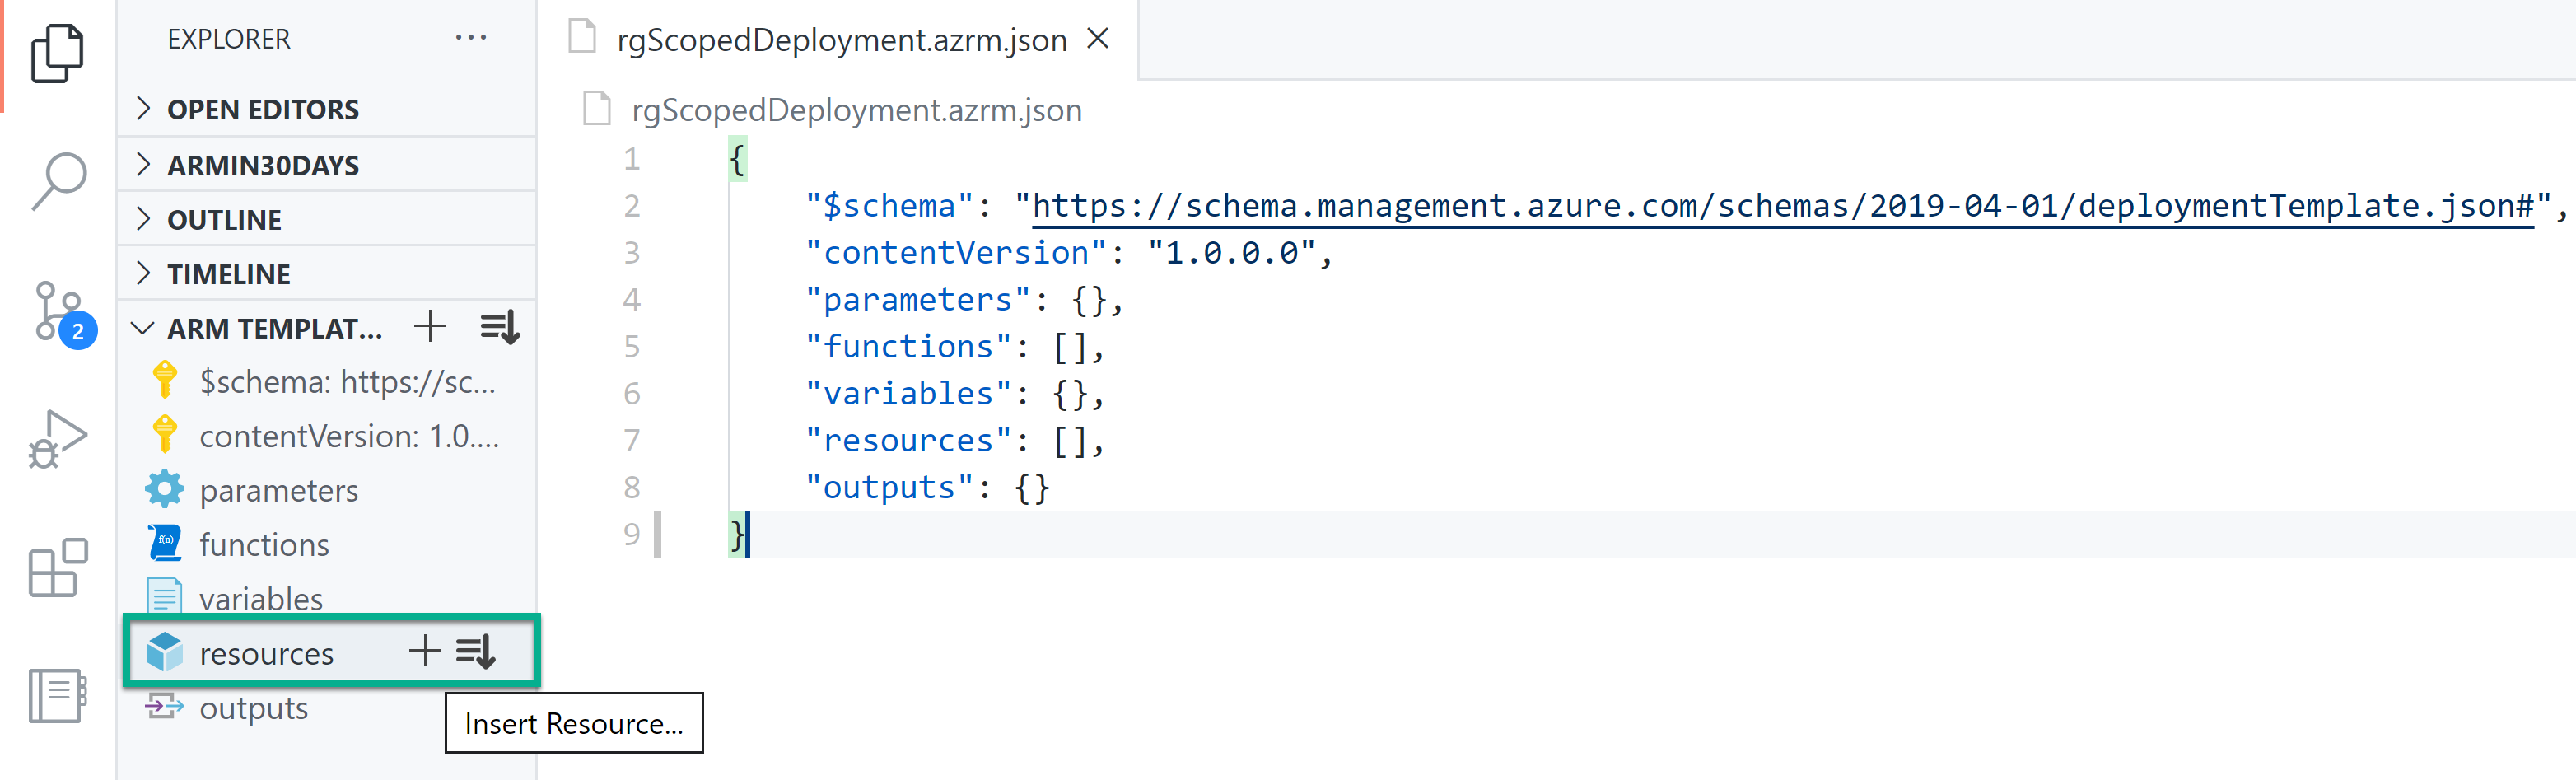
Deployments scoped at the resource group level are the most common deployments. In this method, you provision resources within a resource group in your subscription. Within the VS Code editor, typing arm! brings up the snippet for a resource group scoped ARM template.
You can see in the above snippet that the $schema value is different from what was used for a subscription scoped deployment. Within this template, you can either right-click in the editor window and select Insert Item in the context menu and select Resource or click + next to resources in the ARM template outline to add any additional resources you need.
Either of these options will present you with a list of available resource types. To add a storage account resource type, select Storage Account from the list of resources. You may go ahead and add a virtual network resource as well. This is how the updated template will look like.
As you see here, the insert resources method adds the resource definitions with pre-defined default values. You may not be able deploy this as-is since some of the resource names (storage account especially) might be taken already. You may enter some unique names for the resources and try template deployment using the deploy to Azure button below.
When this template opens in the Azure portal, you will be prompted to select either an existing resource group or create a new resource group. Since you already created a resource group in the last part of this series, you can select the same. For the resources (storage account and virtual network), the selected resource group’s location will be used. This is specified in the template using the built-in resourceGroup() function. You will learn more about these functions and expressions in a later part of the series. For now, just remember that resourceGroup().location will give the location of the resource group selected for the resources’ deployment.
Parameters in ARM templates
The template that you just built provides a good foundation to start experimenting with parameters in an ARM template. In the template above, there are several resource properties that can be parameterized so that the template becomes reusable between multiple deployments by providing the necessary input parameters. So, if you have to identify a few parameters within each resource, you may come with a list similar to the one below.
| Resource | Parameter Names |
|---|---|
| storageAccounts | storageAccountName, storageAccountSku, storageAccountTier |
| virtualNetworks | virtualNetworkName, virtualNetworkAddressPrefix, VirtualNetworkSubnetName, virtualNetworkSubnetAddressPrefix |
With this list handy, take a look at the syntax for adding parameters.
Within all possible elements described above for defining a parameter, only name and type are mandatory. Rest all elements provide a way to control the input values. For the type element, the allowed values are string, int, bool, securestring, object, secureObject, and array. The type of a parameter depends on the resource property that we choose to parameterize.
The allowedValues element in parameters can be used to define a set of valid values for the selected resource property. For example, Azure supports two type of storage tiers – standard and premium – for any storage SKU. Any other value for this property will be invalid. When an end user does not select any value out of the allowed values for a property, you can default to a known value using the defaultValue element.
The maxLength and minLength are used for string data types. Within the above template, these elements can be used for the name property of the resources to define the minimum and maximum allowed length of the string input. For example, an Azure storage account name should be between 3 to 24 characters in length. These elements can be used with array type as well.
The minValue and maxValue elements are used for parameters of int type. In the parameter selection that we did, there is no need for using these elements yet. You will see the use of these elements in a later part of this series.
With this understanding, you can define the parameters for this template as below.
The parameter definitions above provide a clear idea about how to use the allowedValues and defaultValue elements in a parameter definition. Now, how do you use these parameter values in the template for resource properties?
Using parameter values
The built-in parameters() function can be used to retrieve the value provided by the end user as a part of template deployment. This function takes the parameter name as the argument and retrieves the value. For example, [parameters('storageAccountSku')]. You may now update the template above to change the static values to use the parameters() function.
Deploying parameterized templates
You can try deploying the parameterized template by clicking on the below deploy to Azure button.
This will bring up the input blade for this template deployment.

Take a look at how the array value for the virtual network address prefix is provided. The * next to a parameter name indicates a mandatory parameter or a parameter that has no default value. If you hover the ! icon next to the parameter name to see (balloon tip) what the parameter is about. This text is you added in the parameter metadata element as description.
The parameter ‘Virtual Network Address Prefix’ accepts values of array type and it can be seen from the example above how array values are provided. The array values must be enclosed in square brackets.
Now that you have tried the portal experience of deploying templates, take a look at how you can do that at the command line using Azure CLI. With Azure CLI, there are many ways of providing template parameter input. Inline parameter values is one such method.
In the above command, a resource group for the template deployment gets created first. The az deployment group create command performs the template deployment by using the template URL as the argument to --template-uri parameter and --parameters is used to supply all template input parameter values. The URL specified as argument to the --template-uri parameter must be accessible from Azure. As an alternate to the --template-uri parameter, you can use the --template-file to specify a local path to the template JSON file.
As you see in the above Azure CLI command, all mandatory parameters (parameters with no default values) should be provided as key-value pairs separated by space. This can be quite daunting and error-prone if you have a lot of template parameters. You can also provide a JSON string as an argument to --parameters. Also, when using Azure CLI, you must know the names of the parameters to be supplied as input. This is where the parameter files will come in very handy. You can either create one manually or use ARM Tools VS Code extension to generate one for you.
To use VS Code extension to generate the parameter file, right-click anywhere in the template editor window and click Select/Create Parameter File. In the command window, select New and then All Parameters. This will prompt for a name and location for the parameter JSON file. Here is how the generated parameter JSON will look like.
You can fill-in the required values and use the following Azure CLI command to start the deployment.
This command specification is way simpler than using inline parameters or JSON string.
Apart from the inline key-value pair specification, the @d4-paramJson.json (@{path}) specification references a file in the local folder path. This is most preferred in case of CI & CD of ARM templates in which the parameter JSON file can be auto-generated during build processes. Also, you can use a mix of inline parameters and parameter JSON as well. You can explore more such examples using az deployment group create --help.
Summary
In this part, you looked at how to add resources to an ARM template and learned how to parameterize the template for reusability. Parameters in ARM templates support multiple data types and learned how to use string and array data types in this article. You will learn about using other data types in the later parts of this series. You learned how to use Azure portal and Azure CLI for template deployments. You looked at using inline parameter key-value specification and looked at creating and using parameter JSON files as well. In the next part, you will learn how to build expressions and variables in ARM templates.
Comments
Comments Require Consent
The comment system (Giscus) uses GitHub and may set authentication cookies. Enable comments to join the discussion.