Getting Started With Azure Bicep
In the first part of this new series of articles on Azure Bicep, you learnt about what is Azure Bicep and why it is needed. In this part, you will learn about how to get started with Azure Bicep.
Installing Bicep
To start working with Bicep you will need, at a minimum, the Bicep CLI. There are multiple ways to get Bicep CLI on to your system. On Windows systems, you can use any of the following methods.
- PowerShell
- Azure CLI (2.20.0 or above)
- Windows installer
- Choco package manager -
choco install bicep - Winget package manager -
winget install -e --id Microsoft.Bicep
PowerShell
Here is a PowerShell script that I use to install Bicep on my development system. This is a modified version of what is available in Bicep documentation page.
|
|
Azure CLI
Azure CLI, version 2.20.0 and above, has a sub command to work with Bicep. So, any command that reference Bicep will auto-trigger Bicep install if it is not already installed. You can manually install as well using the az bicep install command.
Authoring Bicep Files
I recommend that you use Visual Studio Code for authoring Bicep files. The Azure Bicep extension helps in providing auto-completion and linting for the Bicep language. This extension gets activated when you open or save a .bicep file in VS Code and provides snippets that will get you started. Since Bicep language uses the resource API specification, the Bicep language service behind VS Code will be capable of providing context-aware auto completion.
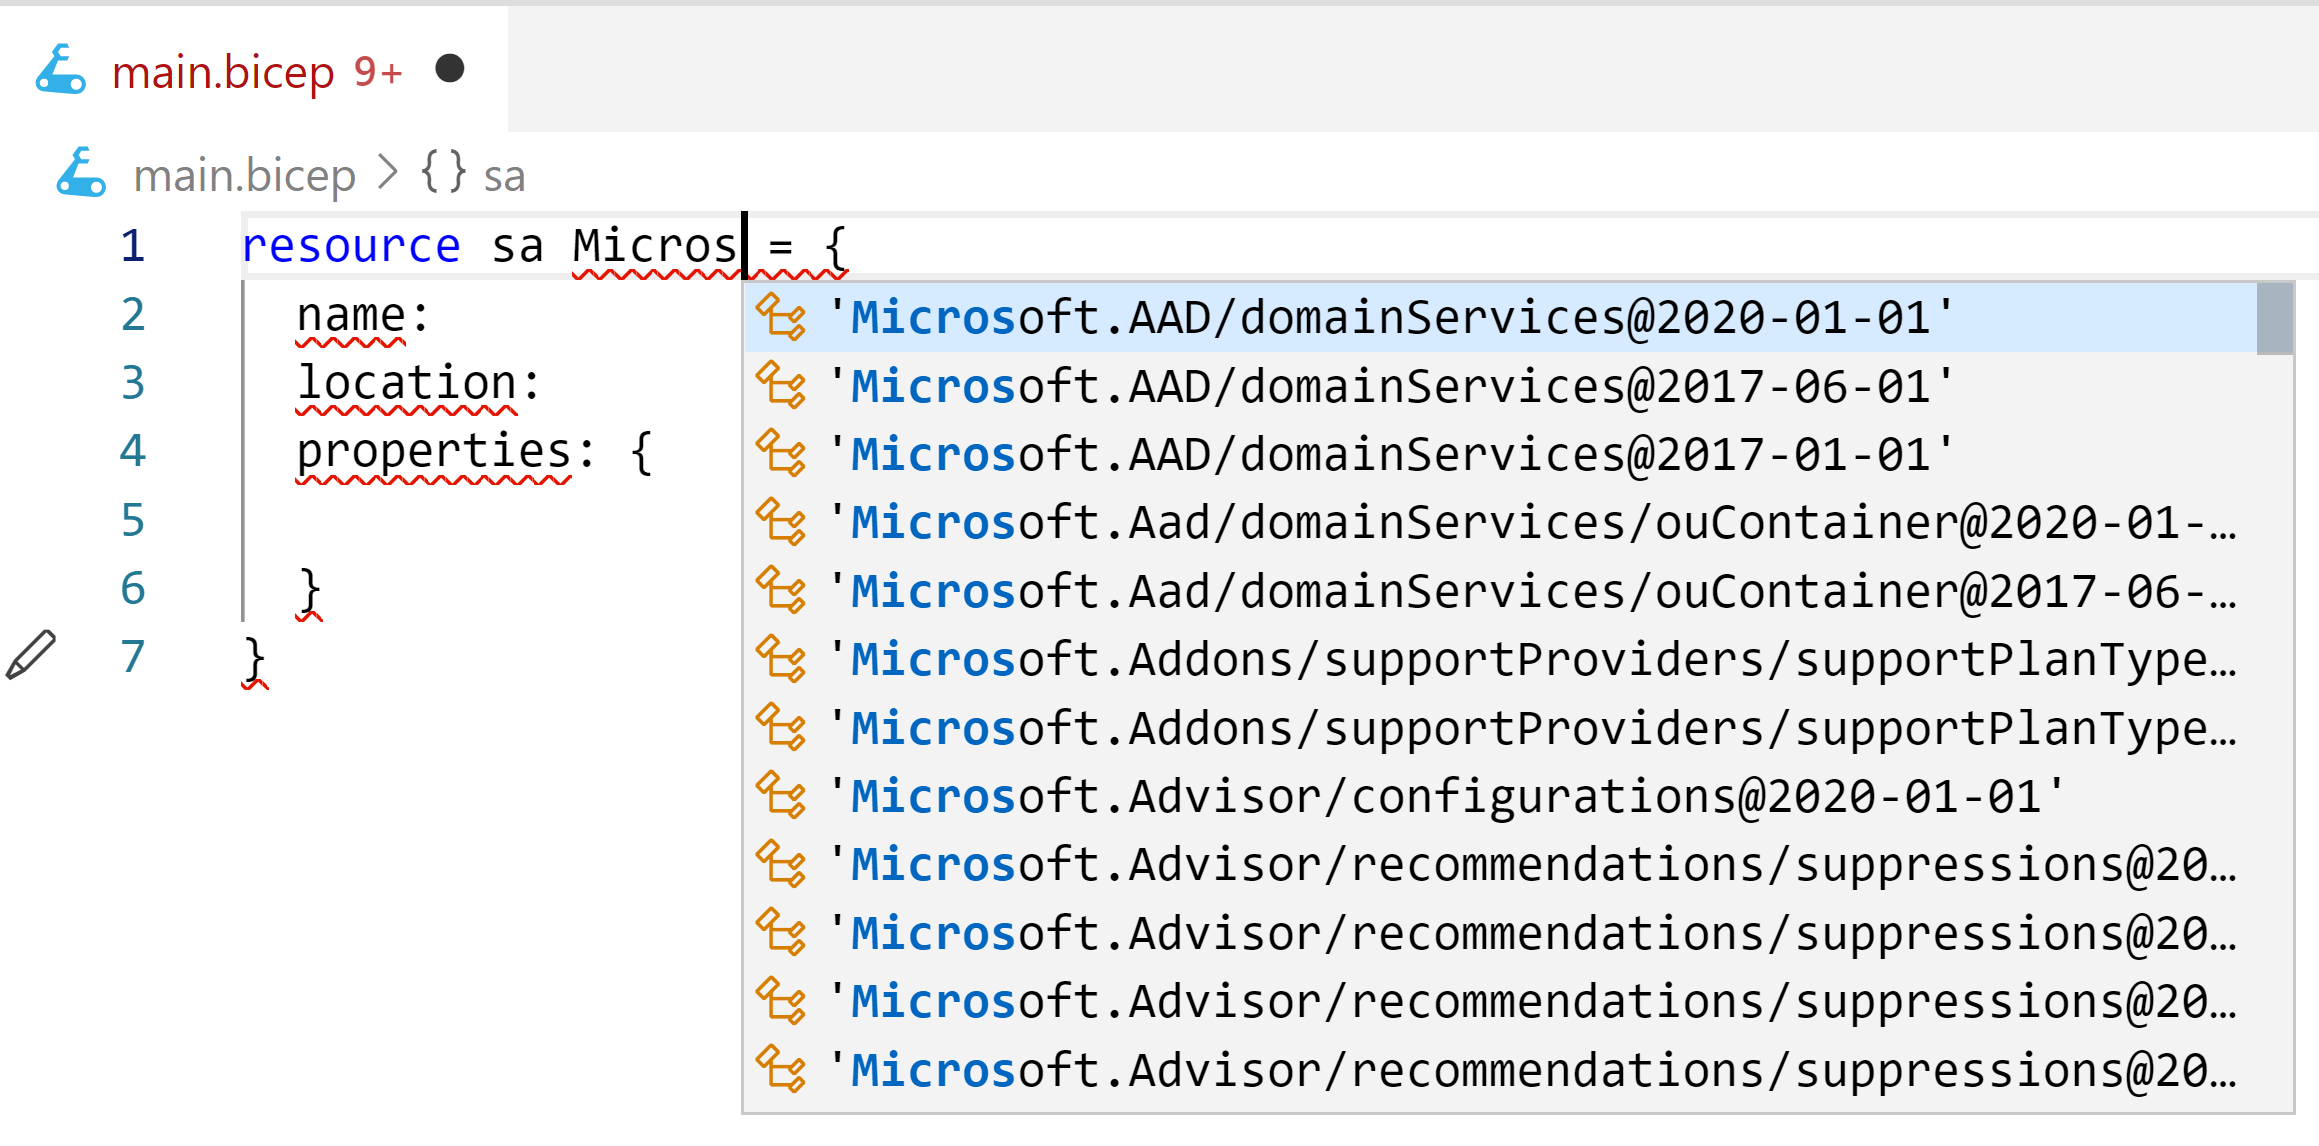
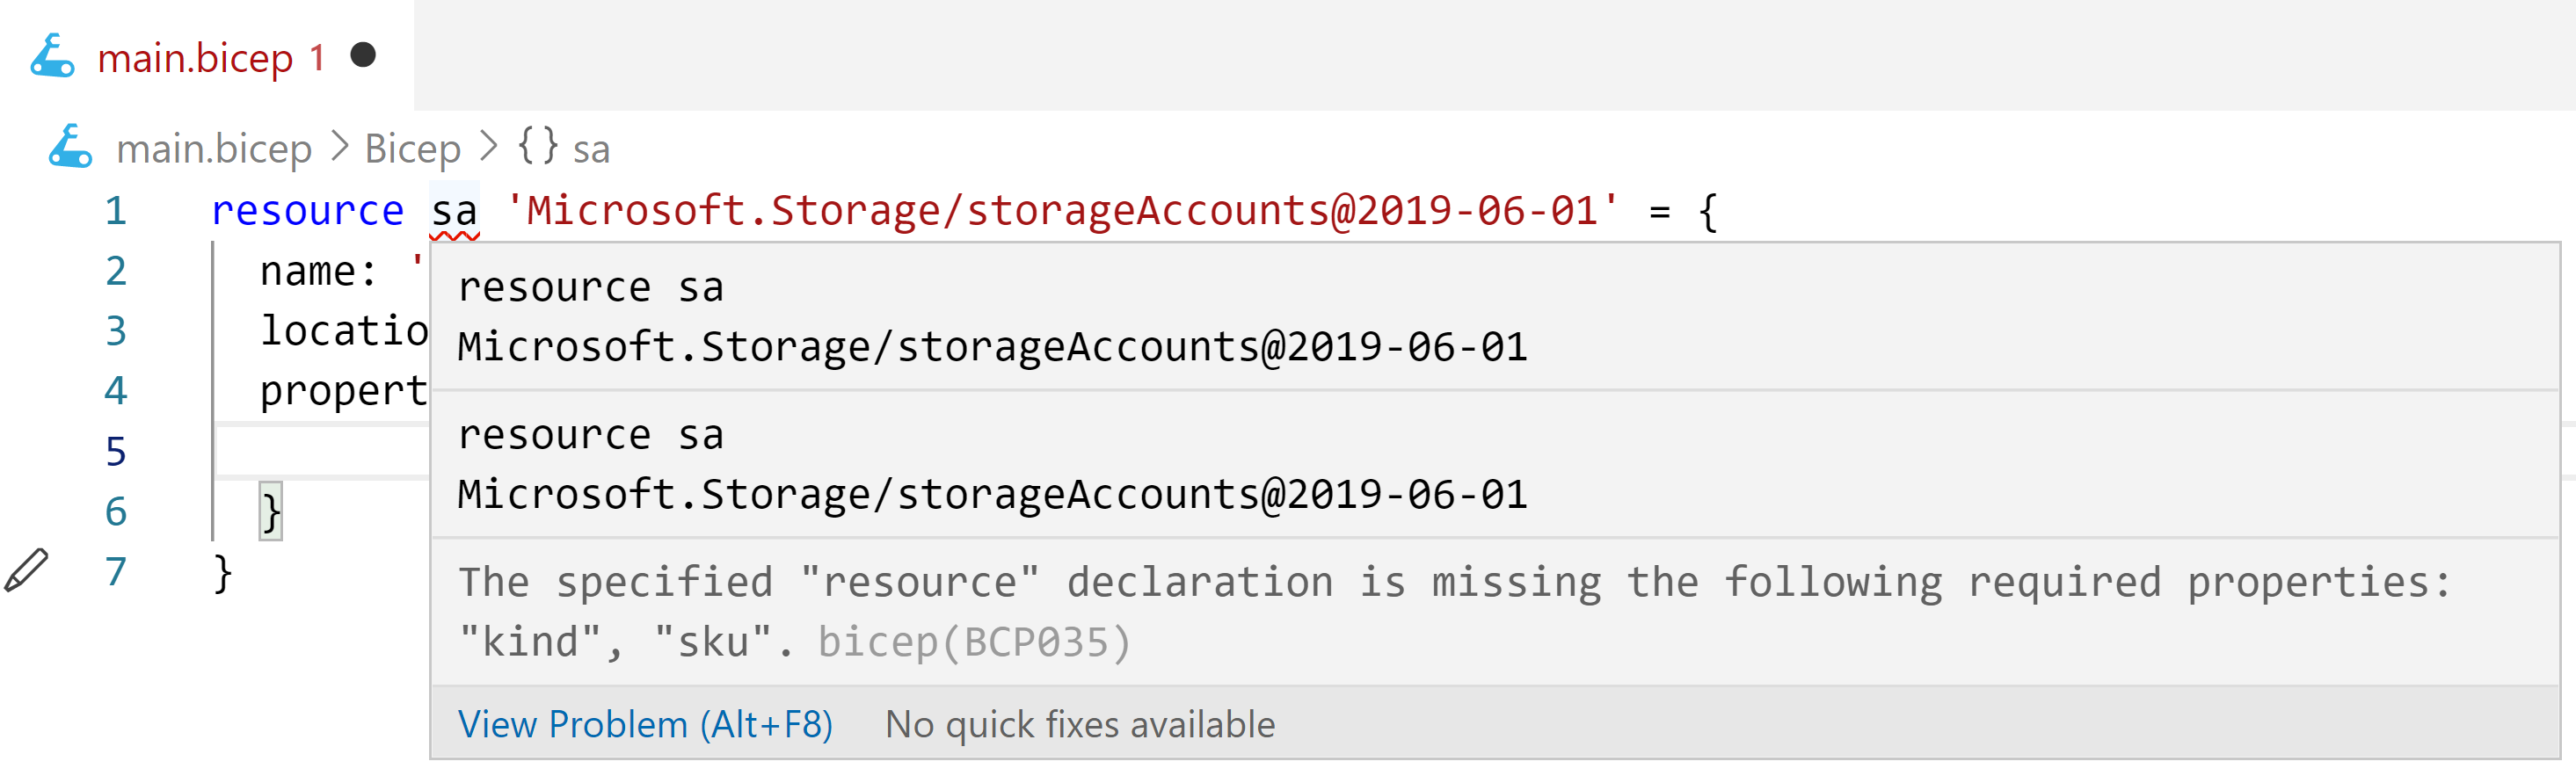
If the resource type is specified, using the Bicep language services, you will get tips around other missing mandatory properties.
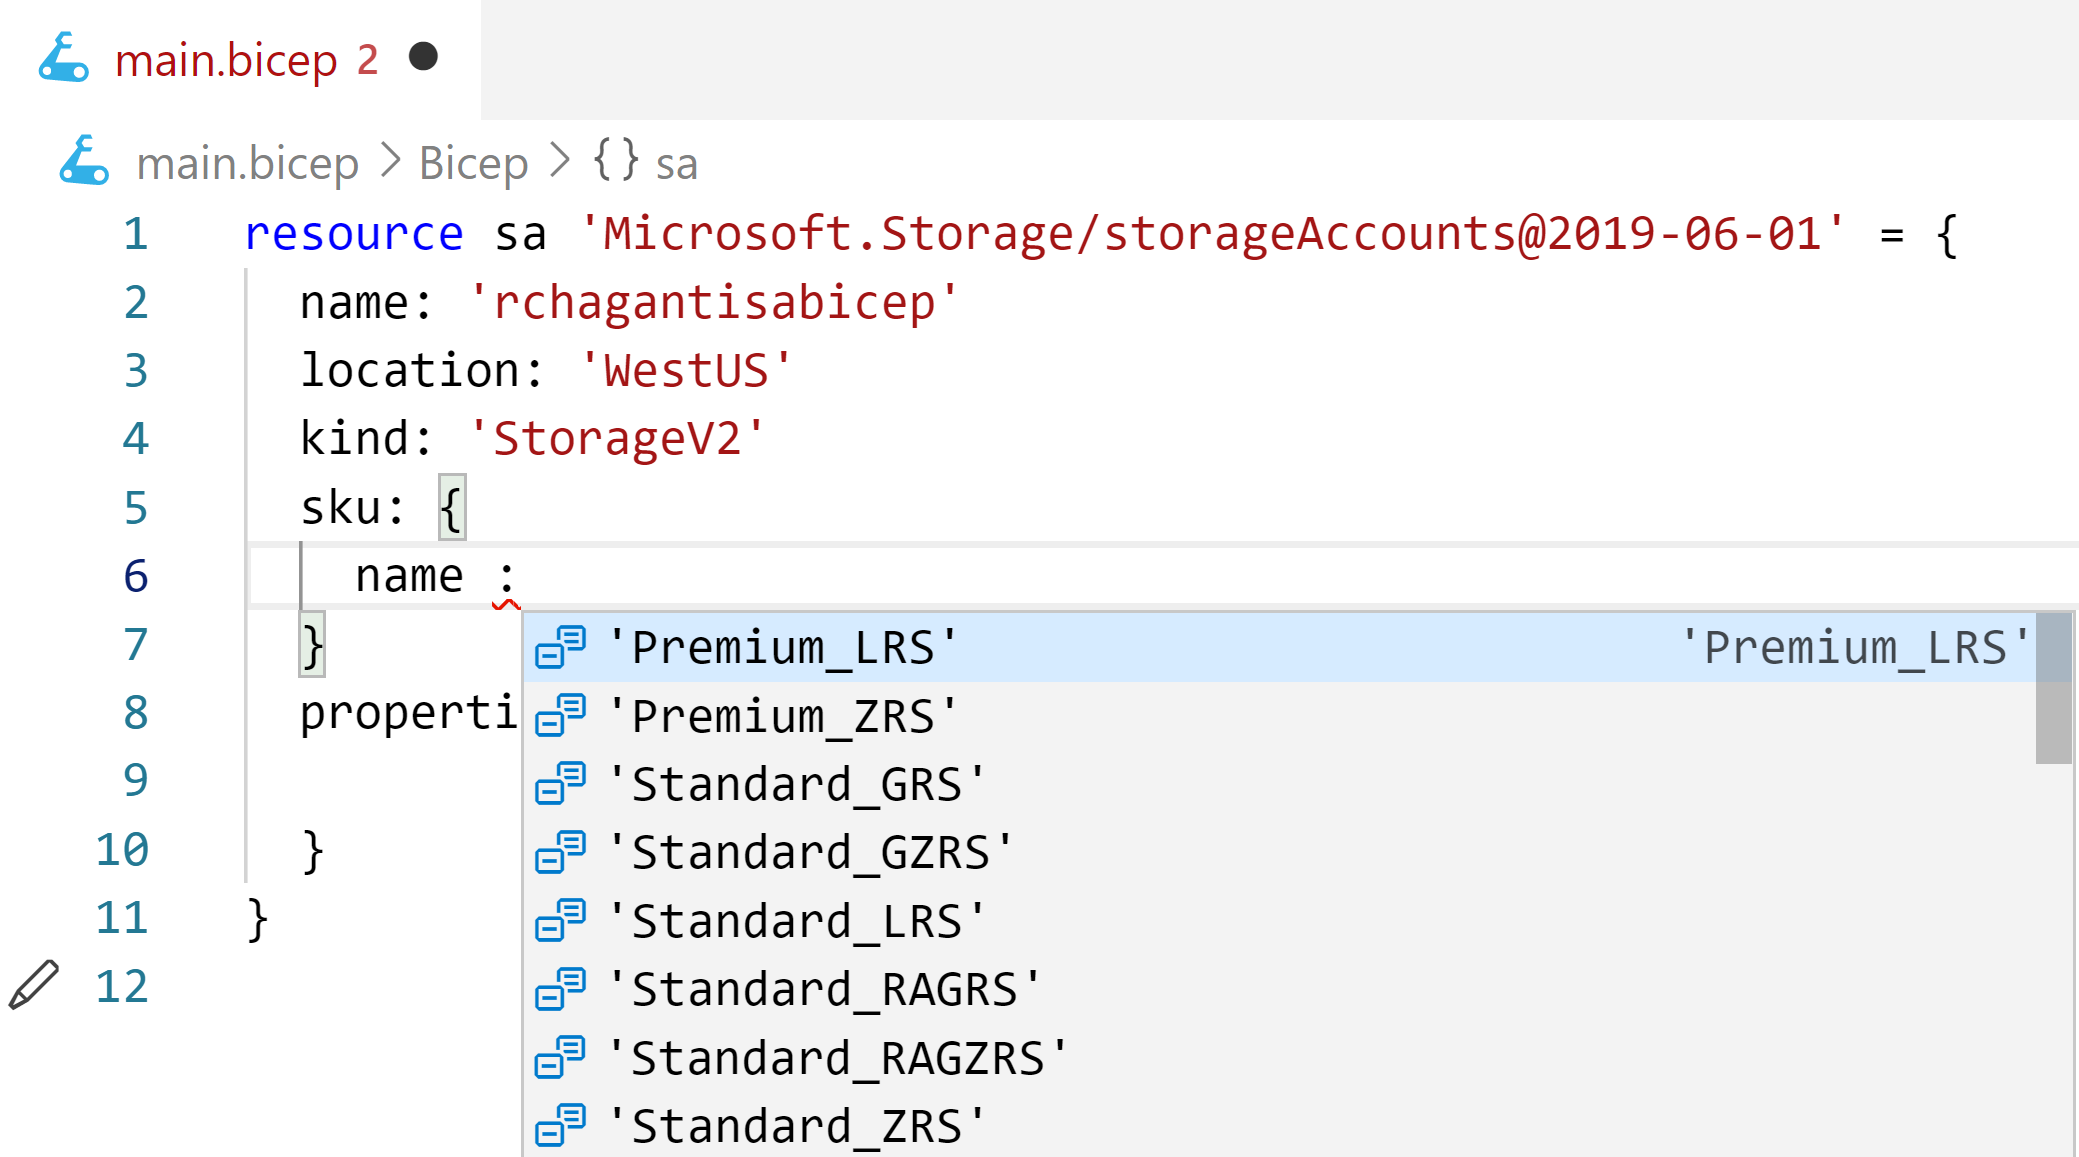
With this context-aware completion, not just the resource property names but also the possible property values are shown as well.
Overall, if you are using Bicep for generating ARM templates, this VS Code extension is must.
Basic Syntax
Before you get started with authoring ARM templates as Bicep files, you need to first understand the basic structure of program in Bicep.
Start with the minimum required elements in the Bicep file.
|
|
Resource keyword
The resource keyword is what you can define/declare a resource that you want to provision. The resource-symbolic-name is an identifier given to this instance of the resource. You can, in other parts of the Bicep file, refer to the properties of this resource instance using this symbolic name. This is not the name of the resource as it appears in Azure Portal after deployment.
For each resource instance, you must provide the resource type and API version of the resource type to use. This must be provided in the format 'Microsoft.Provider/Type@APIVersion'. For example, Microsoft.Storage/storageAccounts@2019-06-01 is the valid resource type and version specification for Azure storage account resource.
Resource Properties
Within the resource properties, you must specify name of the resource and location for resources that require a location. Based on what resource type you intend to provision, there may be other properties that you have to specify. For example, storage account resource type needs kind and sku properties as well. The properties object is then used group all other resource specific properties. For example, for an Azure storage account, you may want to specify an accesstier.
With Bicep, these are the minimum required elements in a Bicep file to generate the ARM template. Here is an example.
|
|
You can generate an ARM template by compiling this Bicep file.
|
|
The generated ARM template will be similar to what is shown below.
|
|
You can deploy this using your favorite command – either Azure CLI or Azure PowerShell.
|
|
In fact, when using Azure CLI (2.20.0 or later) , it is not necessary to even compile the Bicep file. Azure CLI will take care of that. So, the following command will have the same effect as the previous one.
|
|
Alright. This is it for today. Tomorrow, you will learn what is beyond basics!
Comments
Comments Require Consent
The comment system (Giscus) uses GitHub and may set authentication cookies. Enable comments to join the discussion.