Local CI/CD for your Bicep templates
One of the very important aspects of Infrastructure as Code (IaC) is automation. And, it is not just about the configuration tasks that we must automate but it is also the entire validation and deployment / delivery workflow itself. We call this a continuous integration (CI) and continuous delivery / deployment (CD) pipeline. The core idea of a CI/CD pipeline is to accelerate testing and uncover any bugs and fix those bugs before the code reaches production. There are many ways and tools to implement a CI/CD pipeline. We can use GitHub actions or Jenkins or AppVeyor to name just a few. But, as a starting point, I prefer building a local CI/CD pipeline using git hooks. In this article, I will show you how I built a simple test and deploy pipeline for my Azure Bicep experiments.
Git hooks is not a new concept. These hooks are simply scripts that execute before or after Git events. These Git events include commit, push, pull, and so on. Every Git repository contains a hooks folder under .git folder at the root of the repository. There are bunch of sample scripts already there for us as a reference. We can use that as a starting point or create something of our from scratch.
You can clone the repo https://github.com/rchaganti/bicepcicd to understand how I built this local CI/CD pipeline. The rest of the article explains the same.
First, you need a Git repository. You can download and install Git from https://git-scm.com. Once you have the Git binaries installed, you can run the following commands to create a local repository.
|
|
Once a repository is created, you will see a hidden .git folder and a folder called hooks within that. To initiate a script after a commit is complete, we need to place a post-commit script in the hooks folder. Here is what we will use as a post commit script.
|
|
This is a simple shell script and calls a PowerShell script that does the real magic. We can save this as post-commit (no extension) within the hooks folder. We will now look at the post-commit.ps1 script.
|
|
The above PowerShell script takes one argument – CommitMessage. Whatever commit message we specify along with the git commit -m command gets passed as an argument to this PowerShell script. For the purpose of providing a choice of task to execute, we can use a fixed format for the commit message.
|
|
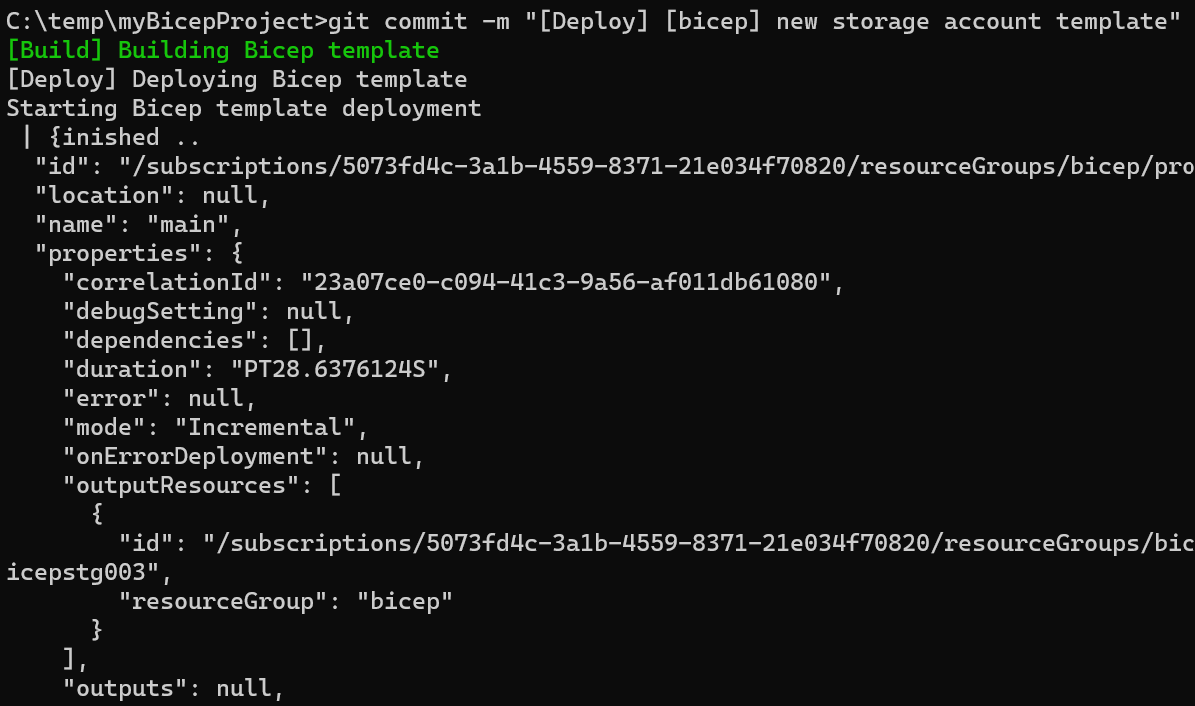
The first part within the [] describes an action. We can set it to Build or Deploy.
If the action is set to Deploy, the second part within the [] provides the resource group to which the deployment will be performed. The rest of the commit message can be ignored. So, the post-commit.ps1 script uses the action to identify what needs to be executed. In case of Bicep, the build step includes linting as well as build. Therefore, we can combine that into a validation or linting step and perform deployment only if the linting completes successfully.
This script assumes that you have Bicep and Azure CLI installed and you have already completed Azure device login on the system where this git hook runs.
We need to save this PowerShell script in the same folder as the post-commit shell script. Now, we can get to the real work. We need a Bicep template and a bicepconfig.json to enforce linting rules. For the purpose of this simple experiment, we will create a template to provision a storage account.
|
|
This template adheres to all the following linter rules and therefor we should not see any errors during the linting / build process.
|
|
Once you have all these files created, it is time to perform our first commit.
This is a simple technique. You can extend this further to publish Bicep templates as template specs or to a module registry.
Comments
Comments Require Consent
The comment system (Giscus) uses GitHub and may set authentication cookies. Enable comments to join the discussion.