Creating complex scheduled tasks using WMI Timer events and PowerEvents Module
A few weeks ago, I wrote about WMI Timer events using Win32_LocalTime and then mentioned how to work around the DayOfWeek issue. In today’s post, I will show you how to use WMI timer events to create complex scheduled tasks.
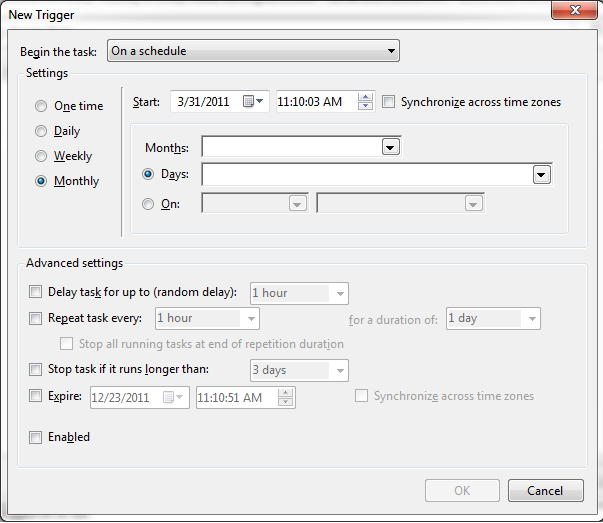
As system administrators, you may have to create scheduled jobs for performing various sysadmin tasks. We generally use Task Scheduler for such jobs. However, using the regular OS task scheduler, there is no easy way to create a scheduled task that occurs — for example — every Thursday of every fourth week of a month in the third quarter of every year.

As I mentioned in my earlier posts, this is one area where WMI timer events are quite useful.
|
|
However, the major drawback of Register-WMIEvent is that the event registration is alive only until the PowerShell consle window is open. So, for this task to execute, you must have the console window open at all times. This is because Register-WMIEvent creates only a temporary event consumer. So, how do we create a permanent event consumer?
We can use Trevor‘s (@pcgeek86) PowerEvents PowerShell module.
What is PowerEvents?
PowerEvents is a Windows PowerShell v2.0 module designed to facilitate the ease of creating, updating, and deleting WMI (Windows Management Instrumentation) permanent event registrations. PowerEvents makes it easy to create WMI event filters (define the events you want to capture) and event consumers (responders to events), and then bind them together to initiate the flow of events. By leveraging permanent event registrations, you can perform advanced monitoring functions on a workstation or server, that would otherwise require implementation of an enterprise monitoring product. Because WMI is incredibly vast in the information it provides, very detailed monitoring can be performed using almost any of the WMI objects that exist on a computer.
There are five types of permanent event consumers that are possible (out-of-the-box) in WMI and the PowerEvents module provides cmdlets to create these five event consumers. In today’s post, lets look at the command-line event consumer. This is the apt choice for creating scheduled tasks in combination with WMI timer events.
To be able to receive WMI events at all time, we need to create an event filter, create an event consumer, and then bind them together. This process is explained in detail at http://msdn.microsoft.com/en-us/library/aa393014%28v=vs.85%29.aspx. We will see how PowerEvents PowerShell module makes it easy using the new cmdlets.
Note: At the time of writing this post, the publicly available PowerEvents release (0.2 alpha) did not have a functional command-line consumer. To be able to use the command-line consumer as shown in this post, you need to download the changeset listed under source code tab.
Creating an event filter
An event filter is an instance of the __EventFilter system class that describes an event type and the conditions for delivering a notification. So, in our case it is the same WQL query we used in the example above. PowerEvents module provides a cmdlet to create an event filter — New-WMIEventFilter.
|
|
This is it. You have the event filter created. Make a note that you need to store the event filter instance in a variable. This is required since the published version of PowerEvents has no cmdlet way to get a list of event filters. Also, see how I’d used TargetInstance.DayOfweek=9. In real world, there is no 9th DayOfWeek. This is just a work around we need to put in place to make sure the event gets triggered on the desired day of week — in this case 4 (Thursday). We could use a WMI query to get that list but I will save it for another post.
Creating an event consumer
An event consumer is a recipient of notifications that report an occurrence of an event. An event consumer is either temporary or permanent. The cmdlet for creating an event consumer is New-WMIEventConsumer. In this post, I will show you how to create a command-line consumer. The idea is to invoke a backup script when the event fires. For a list of other consumer types, refer to http://msdn.microsoft.com/en-us/library/aa393649%28v=VS.85%29.aspx. Here is how we create a permanent event consumer using PowerEvents module.
|
|
The *-CommandLineTemplate* takes the path to the backup script. Also, note that the ConsumerType is set to CommandLine in this case. Again, make sure you store the instance of consumer in a variable. We need it later.
Binding a filter and consumer together
Now, as a final step, we need to bind the event filter and the consumer together so that the backup script gets invoked when the timer event gets triggered on the specified date & time. To do this, we will use New-WMIFilterConsumerBinding cmdlet.
|
|
Remember why I said that we need to store the instances of filter and consumer? It makes it easy to bind them together.
This is it. The backup script gets triggered once the timer event gets fired. This is just one example of creating complex scheduling tasks using WMI timer events. And, using PowerEvents makes it easy to create permanent event consumers. Go and explore it yourself.!
Comments
Comments Require Consent
The comment system (Giscus) uses GitHub and may set authentication cookies. Enable comments to join the discussion.